CS 6965, Hardware Ray Tracing
During this class, we started from ray tracing and finished with Kajia-style path tracing. One of the class requirenments was for our code to compile via LLVM and the result to be simulated by a cycle accurate hardware simulator of the TRaX SPMD architecture.
I rendered a few scenes with several different effects all of which are shown on the project page. One of the scenes for the final project had 2.4 million triangles. The resulting images for each project are shown in sections labeled Creative Images. All of the code is available for download but requires TRaX API.
Projects
- visibility and setting up
- lambertian shading and shadows
- boxes, triangles and TRaX memory
- BVH traversal
- super-sampling and path tracing
- (best) creative images

Project 5: Super-sampling and path tracing
Updated: 10.24.11
Description
This project has several main things to work on. First, we needed to extend the fourth project to utilize supersampling by shooting multiple rays per pixel. There are a couple of things to do here: completely random sampling per pixel, jittered sampling, box filter, and triangle or Gaussian filter.
The secondary (tougher) thing to implement was Kajia-style path tracer, but we must implement it to use a point light source. I plan to extend the path tracer to utilize an area light source as well.
All of the implementations utilize the BVH and multi-threading to improve ./run_rt run times.
Part I: Super-sampling
There are two pairs of images shown below. Within each pair, the left image represents the required image we need to generate from the assignment PDF. The right image in the pair is the one generated by my algorithm. The left pair of images has been generated with 1 sample per pixel (random within a pixel), while the right pair of images has 20 samples per pixel (random distribution, for jittered see below).
| 1 spp | 20 spp | |
|---|---|---|
| Reference from PDF |  |  |
| Rendered |  |  |
Extra Credit I: Jittered (and uniform) sampling
I've implemented both uniform and jittered sampling for super-sampling a pixel. See the images comparing different sampling techniques below. Uniform sampling sends a sample through the center of a grid subdividing a pixel. Jittered sampling is basically the same as uniform, but each sample is randomly permuted within each grid cell.
Extra Credit II: Triangle or Gaussian filter
I've implemented box, triangle and gaussian filters for combining the various samples together. Images comparing all of the filters and samplers are shown below.
The images below show difference in rendering scenes with 4 samples per pixel and different averaging filters used. The top row shows the Cornell Box scene (no GI), while the bottom row shows the Sponza scene (no GI). From left to right images show samples: randomly distributed (box filter), jittered (box filter), jittered (triangle filter), jittered (Gaussian filter), unifom (box filter), uniform (triangle filter), uniform (Gaussian filter).
 Random, box filter |  Jittered, box filter |  Jittered, triangle filter |  Jittered, Gaussian filter |
 Uniform, box filter |  Uniform, triangle filter |  Uniform, Gaussian filter | |
 Random, box filter |  Jittered, box filter |  Jittered, triangle filter |  Jittered, Gaussian filter |
 Uniform, box filter |  Uniform, triangle filter |  Uniform, Gaussian filter |
Part II: Kajia-style path tracer
There are two pairs of images shown below. Within each pair, the left image represents the required image we need to generate from the assignment PDF. The right image in the pair is the one generated by my algorithm. The left pair of images has been generated with 1 sample per pixel (random within a pixel), while the right pair of images has 100 samples per pixel (random distribution, for jittered see below).
| 1 spp | 100 spp | |
|---|---|---|
| Reference from PDF |  |  |
| Rendered |  |  |
Creative Image
There are quite a few images I rendered. The left-most two in the top row used the Kajia-style path tracer with a point light. The other images were generated using the full blown path tracer. The results are shown below (hover over each image for details):


Code
Download my project 5 source(tar, 190 KB)
TRaX Simulator Output
Download my TRaX output (Win)(txt, 1 MB)
Download my TRaX output (Lin)(txt, 980 KB)
The output here assumes utilizing accelerated triangle intersections I've implemented a while back. Linux-compiled assembly has 1374 instructions and ran at 107.7692 fps. Windows-compiled assembly has 1363 instructions and ran at 107.6975 fps. Both of the rt-llvm.s files are included with my code.
Linux command: ./simhwrtEdg --load-assembly ../LLVM_Trax/examples/project5_noInh/rt-llvm.s --model test_models/sponza.obj --view-file views/sponza_obj.view --light-file lights/sponza.light --num-samples 15 --ray-depth 3 --num-cores 20 --num-thread-procs 32 --num-l2s 4 --num-icaches 2 --num-icache-banks 16 > ../LLVM_Trax/examples/project5_noInh/outTraxLIN.txt
Windows command: SimHWRTEdges.exe --load-assembly ../../llvm_trax/examples/project5_noinh/project5_noinh_rt-llvm.s --config-file ../trunk/configs/default.config --model ../trunk/test_models/sponza.obj --view-file ../trunk/views/sponza_obj.view --light-file ../trunk/lights/sponza.light --num-samples 15 --ray-depth 3 --num-cores 20 --num-thread-procs 32--num-l2s 4 --num-icaches 2 --num-icache-banks 16 > ../../llvm_trax/examples/project5_noinh/outTraxWin.txt
Time Required/Difficulty
Since I've implemented the sampling in the previous assignments, adding it to the previous project was pretty quick. Following the notes for implementing Kajia-style path tracer was very straightforward and quick. I think implementing everything took about 10 hours or so. I did end up extending the Kajia-style pathtracer to the full blown path-tracer including reflections and refractions, which took a while to debug. Generating images took a very long time (I took over 16 8-core CADE computers basically for the entire weekend :D).
So without image generation (and fixing silly bugs after rendering for hours), the assignment took the magical 20 or so hours. If we do include the time to generate the images, then the time shoots up way into 40 hour range (but it was fun and now I have pretty pictures to show off). I'm looking forward to the final project.
Project 4: BVH traversal
Updated: 10.07.11
Description
This project required us to extend the third project to utilize BVH traversal to render a couple of scenes. For testing purposes, we used the same Cornell Box scene as before. Then we had to render the conference scene which has 280k triangles.
Once again, I've tried to make this program as fast as I could by utilizing quick ray-triangle intersections, not normalizing shadow rays, partial loading of triangles and BVH boxes, traversing BVH front-back relative to ray origin, checking whether BVH intersection lies behind a previous intersection, and expanding TRaX simulator to save triangle edges rather than vertices.
Part I: Required Cornell Box
Below you can see the required and generated images for the Cornell Box scene using BVH traversal. The image on the left is the required one and the image on the right is generated.
 Reference from PDF |  Rendered image |
Below is the collection of TRaX outputs for this scene depending on whether I used Windows or Linux for compiling and running the simulator. Also I explored the simulation time dependency on whether using BVH or not, as well as storing edges or points in triangles. You can see the BVH dot file (dot, 2 KB).
| all triangles (Win) | BVH (Win) | all triangles (Lin) | BVH (Lin) | |
|---|---|---|---|---|
| Tri Points | # instr: 642 fps: 8.2910 TRaX output (txt, 12 KB) | # instr: 1242 fps: 10.4486 TRaX output (txt, 12 KB) | # instr: 642 fps: 8.2908 TRaX output (txt, 12 KB) | # instr: 1254 fps: 10.4457 TRaX output (txt, 12 KB) |
| Tri Edges | # instr: 624 fps: 8.7327 TRaX output (txt, 12 KB) | # instr: 1224 fps: 10.4968 TRaX output (txt, 12 KB) | # instr: 624 fps: 8.7325 TRaX output (txt, 12 KB) | # instr: 1236 fps: 10.4939 TRaX output (txt, 12 KB) |
Part II: Required conference scene
Below you can see the required and generated images for the conference scene using BVH traversal. The image on the left is the required one, the image in the middle is generated and the one on the right comes from TRaX.
 Required image |  Rendered image, CPU |  Rendered image, TRaX |
Below is the collection of TRaX outputs for this scene depending on whether I used Windows or Linux for compiling and running the simulator (see the settings after the table). Also I explored the simulation time dependency on whether using BVH or not, as well as storing edges or points in triangles.
| BVH (Win) | BVH (Lin) | |
|---|---|---|
| Tri Points | # instr: 1249 fps: 5677.5278 TRaX output (txt, 1 MB) | # instr: 1261 fps: 5843.0328 TRaX output (txt, 960 KB) |
| Tri Edges | # instr: 1231 fps: 5782.2185 TRaX output (txt, 1 MB) | # instr: 1243 fps: 5956.2099 TRaX output (txt, 960 KB) |
The differences from using the improved triangle intersection code are about 110fps on each system. One thing that makes me wonder is that there's about 150fps difference between Windows and Linux compiled assembly. This probably means that there are some optimizations that can still be done to extract a bit more performance out of the code.
Linux command: ./simhwrtPts --load-assembly ../LLVM_Trax/examples/project4_noInh/rt-llvm.s --model test_models/conference.obj --view-file views/conference.view --light-file lights/conference.light --num-cores 20 --num-thread-procs 32 --num-l2s 4 --num-icaches 2 --num-icache-banks 16 > ../LLVM_Trax/examples/project4_noInh/cs6965_p4_traxOut_ConEN_Lin.txt
Windows command: SimHWRTPoints.exe --load-assembly ../../llvm_trax/examples/project4_noInh/project4_noInh_rt-llvm.s --config-file ../trunk/configs/default.config --model ../trunk/test_models/conference.obj --view-file ../trunk/views/conference.view --light-file ../trunk/lights/conference.light --num-cores 20 --num-thread-procs 32 --num-l2s 4 --num-icaches 2 --num-icache-banks 16 > ../../llvm_trax/examples/project4_noInh/cs6965_p4_traxOut_ConEN_Win.txt
Extension
Besides what was outlines in the first paragraph of this assignment, there're a couple of things I've played with:
- colored refractions with the Fresnel terms (using Schlick approximation), but without nested dielectric materials. Sadly, there's a strange bug where sphere refractions don't work with TRaX triangles, but reproduced scenes in "code" work perfectly
- ability to run ./run_rt with a specified number of threads in parallel using pthreads
- jittered n x n sampling with a box filter
- procedural tile generator
Creative Image
You can see the images below. The leftmost image is the re-generation of one of my earlier scenes, but now with one sphere being refractive (with Fresnel reflection term). The middle image is showing off reflections, refractions and procedural (tile) texturing all in one scene. There are three spheres (two refractive, one reflective) and two boxes (one reflective and one refractive). One can see a lot of interesting interplay between the objects. The rightmost image is my mega image with 2,427,680 triangles coming from many standard graphics models. To make sure the reflection on the Utah Teapot was smooth, I generated it at the resolution of 204K vertices from the original Bezier patches using some MATLAB code. Output image at 5122 of the scene took about 17min to generate using 4 threads on a dual-core mobile i5 processor (including the single-threaded BVH build).


Once again there were a couple of blunder images, shown below. The leftmost image shows what happens when precision errors occur during a triangle-ray intersection. The right image shows one of the cool-looking bloopers (the left sphere looks like its melting out of the wall) I generated while setting up the correct parameters for the camera location and such.
 Triangle intersection bug |  Camera placement |
Code
Download my project 4 source(tar, 107 KB)
Updated Code
Download my updated project 4 source(tar, 152 KB) It includes the necessary TRaX and SimHWRT updates.
Time Required/Difficulty
Extending Project 3 to allow it traversing the BVH wasn't too terribly difficult. The whole endeavor took about 10 hours or so. The notes given in class were excellent for getting started.
One trouble I ran into was purely precision-related during triangle intersections. The conference scene showed this very well, since there are a lot of very tiny triangles - the curvy handles and backs of chairs disappeard. Tracking this down took a bit of time unfortunately. This (and generating all of the examples) took another 4-5 hours or so.
Getting used the TRaX camera system working right took another 2 hours, and getting the final scene rendering how I wanted it (including generating correct Utah Teapot) was another 4 hours. Adding in the few final extensions took about 2 hours. In the end, I'm pretty happy with the results shown here and am excited to see how good (and long) the mega image will take to generate using path tracing.

Project 3: Boxes, triangles and TRaX memory
Updated: 09.27.11
Description
This project required us to implement boxes (gearing up for BVH), triangles and use TRaX memory architecture to load a scene from it to be rendered (full of triangles and diffuse materials). We also were required to run our second project on TRaX and report how well it has done. I've spent some time optimizing it, and I think I've reached the fastest I could come up with. Basically I re-used the code from the second project as well as it's no-inheritance option to write this.
Below is the updated code as well as the TRaX output based on compilation from both Linux and Windows. Pre-compiled Windows version of llvm-gcc produced smaller code (865 instructions) which "ran" slightly slower (69.8257 fps), compared to the Linux llvm-gcc at 894 instructions and 72.0125 fps.
Updated Project 2 Code
Download my updated project 2 source(tar, 54 KB)
TRaX Simulator Output
Download my TRaX output (Win)(txt, 10 KB)
Download my TRaX output (Lin)(txt, 10 KB)
After a recent class, I have messed around with the code to try to make it even faster by removing any private data members, all getters and any loops. Doing this alone gave about 11fps extra for "free," although the number of generated instructions increased dramatically. Win went from 865 inst at 69.8257 fps to 1408 inst at 83.9109 fps. Linux went from 894 ins at 72.0125 fps to 1436 inst at 83.7774 fps. This correspond to about 16% increase in rendering speed. The updated code as well as the TRaX output is below.
Updated Project 2 Code, v2
Download my updated project 2 v2 source(tar, 50 KB)
TRaX Simulator Output
Download my TRaX output (Win)(txt, 10 KB)
Download my TRaX output (Lin)(txt, 10 KB)
Below, you can see the images that the simulators generated. The one on the left is from Windows run and the one on the right is from Linux.
 Windows output |  Linux output |
Part I: Box intersection test
We needed to generate a couple of images testing the ray-box intersection algorithm. Below you can see the results - the left pair used camera outside of the box, while the right pair used a camera inside the box. For each pair, the left image is the required image, while the right one was generateed by my code.
| Outside box | Within box | |
|---|---|---|
| Reference from PDF |  |  |
| Rendered |  |  |
Part II: Triangle intersection test
We needed to generate a couple of images testing the ray-triangle intersection algorithm. Each triangle is lit with an ambient light and a point light using Lambertian reflection. Below you can see the results - the left image has one triangle facing away from the camera, while the middle image has both triangles facing the camera. The right-most image shows the test for spheres (second project scene).
 Tri intersection test |  Tri intersection test |  Sphere intersection test |
Part III: Required Cornell Box scene
This is where we needed to generate a scene loaded from memory. The scene is composed entirely of triangles. The image on the left is the required one taken from th PDF, while the right one is generated with my implementation.
| Reference from PDF |  Rendered image |
Extension
I've changed the raytracer to be able to render multiple otypes of objects without the use of inheritance. It needed some messy casting and such, but at least it saves pointer chasing. The first scene I rendered was the same Cornell Box from the second project (with a point light source). The TRaX simulator ran the assembly file with 1375 instructions at about 16 fps. I also added reflections - for some reason Fresnel Reflection terms and refraction were giving me a lot of trouble, so I'll save these for later. Once I get those, I'll throw that in with area light sources to get the very nice shadows and caustics. I stuck the few images I generated into the Creative Image section.
Another extension that I've worked on was accelerating ray-triangle intersection tests, by storing edges of triangles instead of just vertices (aka replacing vertex 0 and 2 with edges 01 and 02). For now, I've just updated the triangle class within the simulator (I still need to touch BVH code, but I'll save that for the next assignment since I can test it then). The speed-up in rendering for the required Cornell Box scene was measurable. On Win we went from 7.9947 fps to 8.6198 fps (7.8% improvement). On Linux we went from 6.9119 fps to 7.2633 fps (5% improvement). You can get the TRaX output files below.
Below you can see a bunch of progressions with adding more and more reflection function calls. Left-to-right: 0, 1, 2, 10.
| 0 Bounces | 1 Bounce | 2 Bounces | 10 Bounces | |
|---|---|---|---|---|
| Cornell Box |  |  |  |  |
| Initials |  |  |  |  |
Creative Image
You can see the images below.
 Object support | Perfect reflections |  Creative image |
I decided to add a few "bloopers" that I have come up with, mostly due to some strange behavior with llvm-gcc between pre-compiled Windows version and whatever CADE has installed. The Windows versions of the assembly code sometimes generate correct images while the CADE versions don't. You can see examples of that below.
| Triangle test | Cornell Box | |
|---|---|---|
| Windows llvm-gcc |  |  |
| Linux llvm-gcc |  |  |
Code
Download my project 3 source(tar, 96 KB)
TRaX Simulator Output
Download my TRaX output (Win)(txt, 12 KB)
Download my TRaX output (Lin)(txt, 11 KB)
Improved TRaX Simulator Output
The accelerated output can be seen here (this was compiled with a specific flag to make triangles store edges instead of vertices).
Download my TRaX output (Win)(txt, 12 KB)
Download my TRaX output (Lin)(txt, 11 KB)
Linux command: ./simhwrt --load-assembly ../LLVM_Trax/examples/project3_noInh/rt-llvm.s --model test_models/cornell/CornellBox.obj --view-file views/cornell_obj.view --light-file lights/cornell.light > ../LLVM_Trax/examples/project3_noInh/outLin.txt
Windows command: SimHWRT.exe --load-assembly ../../llvm_trax/examples/project1/rt-llvm_noInh.s --config-file ....\SimHWRT\trunk\configs\default.config --model test_models/cornell/CornellBox.obj --view-file views/cornell_obj.view --light-file lights/cornell.light > ....\LLVM_Trax\examples\project3_noInh\out_Win.txt
Initial project idea
I'd like to implement a beam tracer for TRaX and compare how well it helps in terms of lowering the number of required samples for pixel anti-alising and resolving area shadows. Using beams that hierarchically subdivide down to sub-pixel level where necessary should automatically guide samples where they are necessary saving a lot of computation. One of the difficulties with this is parallelizization to many cores, which must be explored.
Time Required/Difficulty
Most of the time for this assignment was spent optimizing (and removing inheritance from) the source for the second project to make it run on TRaX as fast as possible. Overall, the time spent on this project is once again around 16-20 hours?. The updates necessary to render the required scenes took about 10 of those hours.
The most difficult part of this assignment was making sure that memory is addressed correctly, therefore it was a great idea to split the assignment into two pieces (this one and the next one requiring BVH traversal).
Project 2: Lambertian shading and shadows
Updated: 09.13.11
Description
This is the second project which has a few things we need to do. The first is to make sure our first project can run on the TRaX architecture. See a section below for the TRaX output from my program, which I had to modify because as of this date, TRaX doesn't support class inheritance. I have extended the last project to include a few new classes: MaterialPrimitive, Constants, LightPrimitive, and lightPoint.
I have also updated Camera class to take care of the field-of-view parameter and aspect ratio correctly. The class Constants includes several constants like EPS and such for ray intersections as well as camera's pre-computed FOV parameters. The IntersectionRecord has been updated to hold intersection location, surface normal at the intersection location and pointer to the geometry object that's hit. This allows for some simplification in shading and computing locations. In order to avoid computing the vectors at every intersected object, the maximum ray t parameter is set to the closest intersection location.
Updated Project 1 Code
Download my updated project 1 source(tar, 40 KB)
TRaX Simulator Output
Download my TRaX output (Win)(txt, 20 KB)
Download my TRaX output (Lin)(txt, 19 KB)
Linux command: ./simhwrt --no-scene --load-assembly ../LLVM_Trax/examples/project1_noInh/rt-llvm.s --width 256 --height 256 --num-cores 2 > ../LLVM_Trax/examples/project1_noInh/out256.txt
Windows command: SimHWRT.exe --no-scene --load-assembly ../../llvm_trax/examples/project1/rt-llvm_noInh.s --config-file ....\SimHWRT\trunk\configs\default.config --width 256 --height 256 --num-cores 2 > ....\LLVM_Trax\examples\project1\out256_Win.txt
Below, you can see the images that the simulators generated. The one on the left is from Windows run and the one on the right is from Linux.
 Win simulator output |  Lin simulator output |
Required
I've generated the required image of three spheres. The leftmost image is the reference image from the assignment PDF. The middle image is generated by my algorithm with the original scene. The rightmost image is also generated by my algorithm but with the ambient light power fixed. It's easy to notice that my first image has a reddish tint, which is attributed to the ambient light being different. In the original assignment it was set to (0.6, 0.1, 0.1), but it should be (0.6, 0.6, 0.6).
 Required image |  Rendered image |  ... fixed ambient light |
Extension
First of all, I've added a simple super-sampling technique to create antialiased images. I've added Sampler2DPrimitive and sampler2DNRooks classes to implement basic stratified 2D sampling (using N-Rooks). The leftmost image shows the required scene rendered with 8 samples per pixel.
To generate the middle image, I've extended our Lambertian shader to include specular highlights, as in Blinn-Phong model. The blue sphere is much more reflective (specular exponent of 100), while the yellow sphere is somewhat glossy-looking (specular exponent of 20).
The rightmost two images show a Cornell Box, for which I've implemented a Triangle primitive. There is only a point light source at the center of the top face and a small contribution from an ambient light source. One image shows numerical error during intersection computation, that occurs at the edge shared by two triangles. Supersampling (4 samples per pixel here) solves this problem.
 Antialiasing, 8 spp |  ... Blinn-Phong materials |  Antialiasing |  No antialiasing |
I've also decided to implement area lights, and extended my framework to include Sampler2DPrimitive, Material_LambertianEmitter, and LightArea_Triangle. My first implementation didn't sample the triangles correctly, hence I ended up having a lot of banding artifacts. To play with various sampling methods, I've implemented a bunch of 2D samplers: sampler2D_Uncorrelated, sampler2D_NRooks, and sampler2D_Stratified. To compare the results, I rendered the Cornell Box with 128 samples per image pixel (via N-Rooks) and 25 shadow rays per sample. The leftmost image used uncorrelated random sampling. The middle image used N-Rooks sampling, and the rightmost image used stratified sampling.
 Random light sampling |  N-Rooks light sampling |  Stratified light sampling |
For some reason, stratified light sampling doesn't work too well, but I'll try to figure that out some other time. It's rather interesting that even with 3200 (which should be more than enough), some noise is visible in spheres' shadows for both N-Rooks and random light samplers.
To play around how sampling effects the noise in images, I've rendered images while changing per-pixel supersampling and per-light area sampling parameters are shown below (left-to-right: super-sampling per pixel, top-to-bottom: number of shadow rays sampling each light). Both are sampled using N-Rooks. Click here to ↓ toggle result images ↓


Some banding artifacts can still be seen (although not as strongly as before), which might be due to the use of N-Rooks for both light and pixel sampling. To see if that's true, I've tested out Stratified sampling for pixels, while keeping N-Rooks for the lights. See the results below by ↓ toggling them ↓


This helped somewhat, but there is still some strange correlation noise. I would like to think this is due to the N-Rooks sampling of the lights. So I've just rerun the final few tests using completely random samples for sampling lights. See the results below by ↓ toggling them ↓


It seems that the crazy banding artifacts arise from using N-Rooks for both pixel and light sampling, but only at high enough values for both. Also it seems that increasing samples per pixel reduces noise much faster than increasing samples per light (or shadow rays). According to PBRT, there is a good Low-Distortion sampler based on [0,2] intervals, which outperforms both stratified and N-Rooks sampling. I'll leave it for a future assignment to play with. Also, the very nice images above were generated with 3200 rays per pixel, which is far too expensive. This is a perfect motivation for some sort of adaptive sampling, especially considering the need for a lot of samples within soft shadows, but not for direct-only areas.
Creative Image
I've re-rendered the creative image from last week, but with antialiasing and having some spheres have specular reflections - shown on the left. The middle image is a re-render of the Cornell Box above, but with 20x20 stratified sampling and 16 random shadow rays per ray (total overkill of 6400 rays per pixel). The right image was rendered with same parameters but with light colors changed to show off colored shadows. See the images below:


Code
Download my project 2 source(tar, 93 KB) (won't work in TRaX)
Time Required/Difficulty
The base of this assigment was not too tough to make, since a lot of the required extensions were already implemented the week before. In the end (after chasing silly copy-paste related shadow-ray bug) the assignment took about 16-20 hours. Implementing the necessities for this assignment took about 9 hours.

Project 1: Visibility and setting up TRaX
Updated: 09.05.11
Description
This is the first project, in which we had to learn how to set up the basic ray-tracer using the TRaX architecture. I have implemented several classes (hopefully to be used again later): RayPrimitive, Camera, GeometryPrimitive, Sphere, Color, Vector, and IntersectionRecord.
Required
I have generated a couple of required images. The one on the left was generated using the ray directions as defined in the assignment, while the one on the right was generated with my camera class. Notice that the camera class takes care of the up vector appropriately. (I define the camera frustum based on the eye location, (0,0,-3), up direction (0,1,0), and target (0,0,0). Creating the left-handed coordinate frame, we get frontDir = (0,0,1) = z, upDir = (0,1,0) = y, and therefore rightDir = (-1,0,0) = -x).
 Required image |  ... fixed ray directions |
For comparison, I've also rendered this scene using Blender.

Extension
I've also implemented looking up the closest ray intersection to make sure that the returned visibility corresponds to how the geometry is actually set up. Once again, the image on the left used the assignment's way to compute ray directions, while the image on the right uses my camera class.
 Required image, closest hit |  ... fixed ray directions, closest hit |
Creative Image
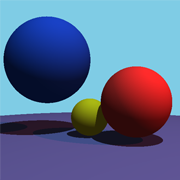
I know there's not much one can do with spheres (and only visibility), but I generated a scene that should look cool once we start doing reflections and refractions. See the image below:

Code
Download my project 1 source(tar, 43 KB)
Time Required/Difficulty
This assigment was not too tough to make. I decided to create the project solutions for Visual Studio 2008, and figuring out what to update so that code compiled (including the Simulator) required about two days of my time (maybe 16-20 hours?). Writing this raytracer from scratch took at most 8 hours, but I have had a lot of experience with it. Overall, I think this is a good project for the 1st assignment that gets everyone up to speed with using TRaX architecture.